Supplies
- Towel: Estate Diamond Weave Towel 16” x 24” – white by Charles Craft, 16 count
- Needle: Tapestry Hand Needles – Size 22
- Floss: Embroidery floss in the colors listed on the chart. Or choose your own colors.
- Hoop: Optional
- Pattern and Color Chart
Directions
Color Chart
Using the color chart:
First print the pattern and color key.
Individual squares are located by counting from the 4 holes in each corner (around where the threads cross).
The design is counted from the chart, not marked on the fabric.
Each colored square on the chart corresponds to a woven “square” on the fabric.
Each thread color is represented by a color on the chart.
Keeping Your Towel Clean
You must keep your project clean. : – ) So, wash your hands every time before you begin. You don’t want oils from your skin to leave stains on the fabric.
Finding the Center
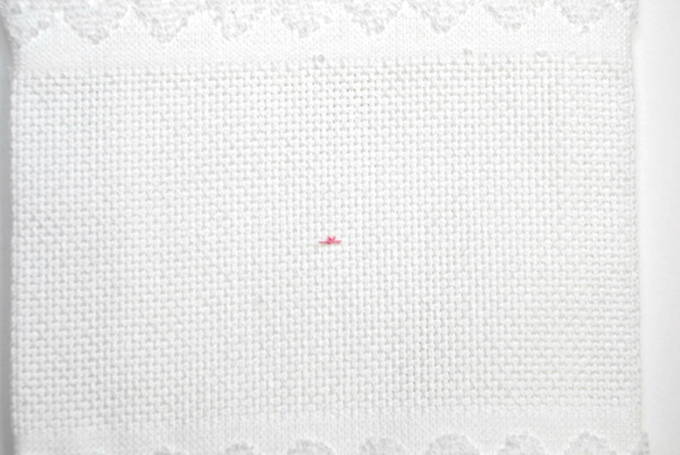
The center of the pattern is marked with a bright pink dot. It’s important for the design be centered.
Find the center of the towel by folding it in half lengthwise
Then fold it in half again across the width.
The point where the folds meet is the center.
Make a small loose stitch to mark the spot. (You can remove it when you don’t need it anymore.)
Then count out from the center to confirm that it’s accurate.

Threading the Needle
Embroidery floss comes in 6 strands.
Find the color you need from the chart near the center to start, and cut an 18” piece.
Separate the strands so you have 2 for cross stitches.
Thread your needle by freshly trimming, wetting, and flattening the floss to get it through the hole.
Always make sure you have at least 3 inches of tail so it won’t come unthreaded.
Stitch from the center and work outward.
Securing the Thread to Begin
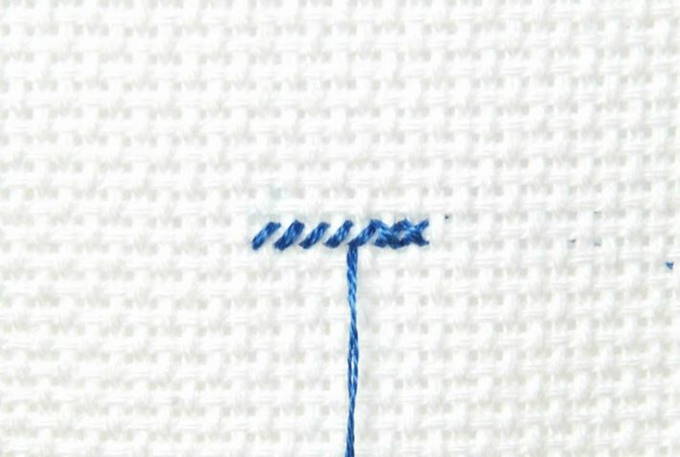
Draw a stitch up through the bottom left hole of the indicated square, pull up until there’s at least an inch of tail left behind.
Hold it with your finger so it doesn’t pull free and is in the direction you plan to stitch.
Then draw down through the top right hole.
As you stitch be sure that the loose tail left on the back is caught in the next loop as you pull through. [See photo below]
Do this with several stitches to make sure that tail thread stays secure.
Then cut the excess off.

[Back of the towel – Stitching over the tail to secure it.]
Stitching
Make several diagonal stitches, following the pattern to the end of a row
Then work your way back by drawing up through the bottom right hole and down through the top left hole to complete the x’s. [See photo and diagram below]

[Front of the Towel – Making the x on the Diagonal Stitches]
 Diagram © DMC-USA.com
Use this method the most. You may need to complete each X as you go for vertical rows.
Your stitches must have consistent tension, not too tight or too loose.
The stitches should lay flat against the fabric.
It’s important that all of the X’s are crossed in the same direction.
If a color has only a few stitches and then jumps to a new area you can either:
fasten off and start again in the new area, or
you can carry (or weave) through threads on the back to get to the new area.
Since this pattern has unstitched areas instead of a background, any thread taken across an open area in the back will show through.
If your thread is getting twisted, let the needle hang from your work until it untwists itself.
Always check the back of your work — make sure you have the correct tension and that there are no tangles.
I cross off the squares on the pattern as I go to keep track of where I’m at.
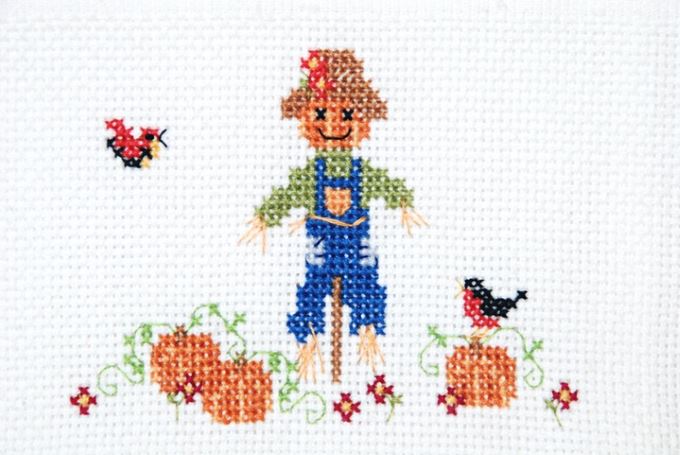
There are a few 3/4ths stitches around his overalls pocket.
So, for the 2nd diagonal part of the x you go down through the fabric where the threads cross (but you don’t go all the way to the hole). [See the diagram below.]
 Diagram © DMC-USA.com
Fastening Off
When you are done with a color, your needle will be at the back of your fabric
So slip it through a few of the stitches in the back in that same colored area to secure the thread and to keep the color from showing through. [See diagram below.]
Or you can weave in a z pattern to make it more secure.
 Diagram © DMC-USA.com
Changing Colors
After you thread a new color on the needle, run it under several stitches on the back to secure the thread and then continue stitching.

Backstitching
Backstitching is a running stitch used to make a straight line. It is not an X. Use one strand of floss to backstitch. Refer to the pattern chart and photo to see how to make each backstitch. [Also, see the diagram below.]
 Diagram © DMC-USA.com
French Knot
The bird’s eye is a French knot made with 1 thread.
When your needle is up you wrap the thread twice around the tip of the needle.
The floss needs to be continuously held taut as its wound around the needle.
Then stick your needle through the fabric that’s super close to where you just came out of.
Keep your thumbnail on those wound wraps as you pull through onto the back until you see a nice little knot. [See the diagram below.]
 Diagram © DMC-USA.com
Scarecrow’s Belt
With two strands of thread, I made a loose stitch across his waist.
Then I came up from one row down and slightly to the right, to catch the belt
Then went back down where I came up.
Finishing
Remove the basting stitch that marked the center of the towel.
Optional Cleaning
When your stitching is completely finished, if you have used an embroidery hoop or it has gotten dirty:
Hand wash in lukewarm water using a mild liquid soap.
Rinse in cold water.
Let it dry flat.