 Supplies
- Hallmark™ orange reversible heavy weight gift wrap paper 25 sq ft.
- Astrobrights™ cardstock – Neon 8.5 x 11”
- black construction paper 6 x 7½”
- 4 sheets of cardstock
- Pencil
- Scissors
- Tape (Test it to make sure it will not damage your door.)
- Yardstick
- Alene’s™ Tacky glue
- Green marker
- Optional: candy wrappers or boxes (none that are yellow)
- Pumpkin Face Patterns
Directions
Patterns
Print 4 copies of the Pumpkin Face Patterns on cardstock.
- First copy of pattern – cut out the large eye and the tooth.
- Second copy of pattern – cut out the small eye.
- Third copy of pattern – cut out the large pupil and the nose.
- Fourth copy of pattern – cut out the small pupil.
Vine
 To make a long strip for the vine, lay out 3 sheets of green paper next to each other in a row. Each paper should be vertical. Glue the papers together so they overlap by ”.
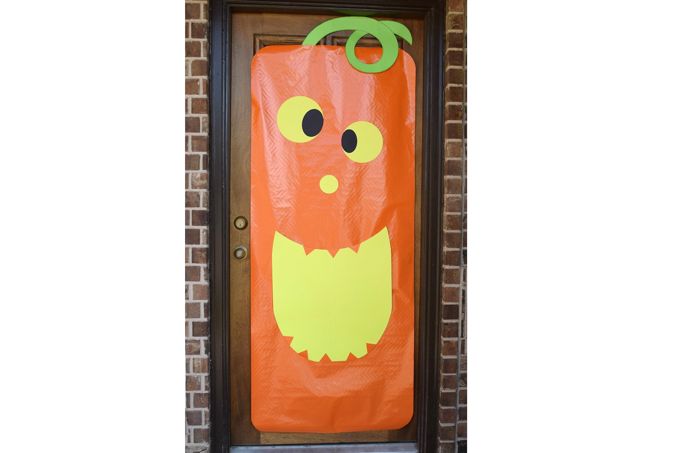
With a pencil, draw the shape shown for the vine. On the pencil lines, trace a thick line over the pencil marks with the green marker. Cut it out. Tape it to the top of the door.
Pumpkin
 Using the large eye pattern, draw rounded corners at the top of the orange paper and cut the corners off.
Position it below the vine as shown. Then securely tape the orange wrapping paper to the top half of the door. Leave room for the door handle on the side.
 Use a yardstick to draw a straight line about 3 inches from the bottom of the door. Cut it off at the line. (Save that piece.)
Use the large eye pattern to draw rounded corners on the bottom of the orange paper. Cut the corners off. Tape the lower half to the door.
Eyes and Nose
 Using 2 sheets of yellow paper, trace the large eye, small eye, and nose patterns. Cut them out.
Use the black paper to trace the large and small pupils. Then cut them out. Glue the large pupil to the inside of the large eye. And glue the small pupil to the inside of the small eye.
Mouth
 To make a large rectangle for the mouth, lay out 9 sheets of yellow paper so that they’re 3 sheets tall and 2 sheets wide. Each paper should be horizontal. Glue them together so they overlap by ”.
Draw the shape of the mouth on the left side of the yellow paper as shown and then cut it out to the middle. Use the cut out pieces as patterns to help you draw the right side of the mouth. Cut out the right side.
Teeth
 Using the excess orange wrapping paper, trace around the tooth pattern and cut out 8 teeth. Glue three on the top of the mouth and 5 along the bottom. Turn it over and trim off any areas where the tooth hangs over the edge of the mouth a little.
Face
Have a friend help you hold the eyes, nose, and mouth over the pumpkin so you can determine where it should be attached. Tape or glue the mouth to the bottom half of the door. Then glue the eyes and nose in place.
 Candy Wrappers (optional)
Glue empty candy wrappers inside the mouth of the pumpkin.