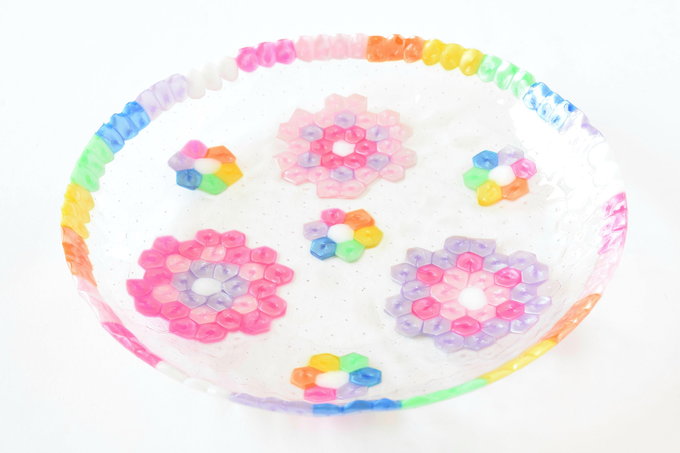
 Supplies
- The Beadery™ Pony Beads – Pearl Multi (900 ct)
- Horizon™ Clear Pony Beads (500 ct)
- * Metal cake pan 9”
- Aluminum foil
- Pencil
- Scissors
- Tweezers
- Metal nail file
- Rimmed baking sheet
- 2 long oven mitts
- * Glass bowl 10” wide rim, 7½” wide base, 5” high
- * Glass bowl 8” wide rim, 4” wide base, 3½” high
* Note: The sizes on the cake pan and glass bowls are critical. Using other sizes may cause wrinkles. Solid colored pony beads melt slower and cause more holes.
Results will vary: This bowl may have some holes and wrinkles in it. Your results will depend on how full you fill the pan with beads, what beads you use, the size of your bowls, and how well you press it.
Directions
Pan Liner
Put the cake pan on top of a sheet of aluminum foil. With a pencil, trace around the base of the pan. Cut the circle out and put it in the pan with the shiny side down. (This helps you see your bead colors better.)
Don’t bake the beads directly on a pan without the aluminum foil for two reasons:
- Colored beads can leave a mark on a new pan.
- The design can absorb marks from stains on a pan.
Outline
 The outline needs to be done first to weigh the foil down – so it doesn’t slide around in the pan.
All of the beads should be placed on their side so the hole is facing up. I used tweezers to move the beads.
Don’t use beads with dirt spots. Any spots on the outside or inside of a bead will stand out when melted.
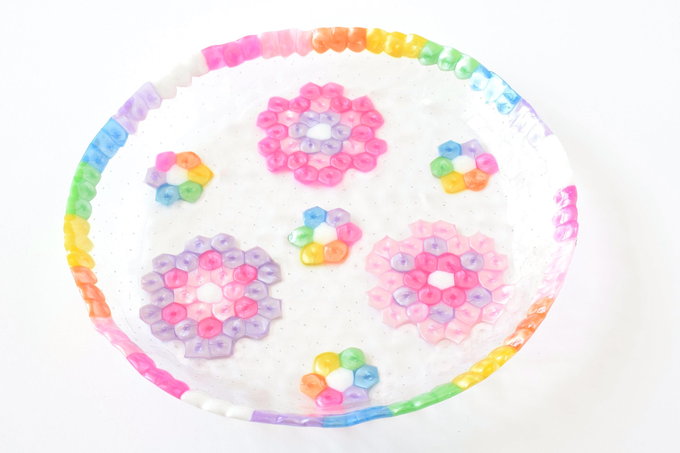
Put beads around the outside of the pan in rainbow order with 3 beads per color. Add in one more bead of your favorite color. They need to fit snugly and be right up against the edge. As you add beads, check that the outline beads don’t ride up on the side. They need to lay flat.
Add 2 rows of clear beads just inside the rainbow outline.
Flowers
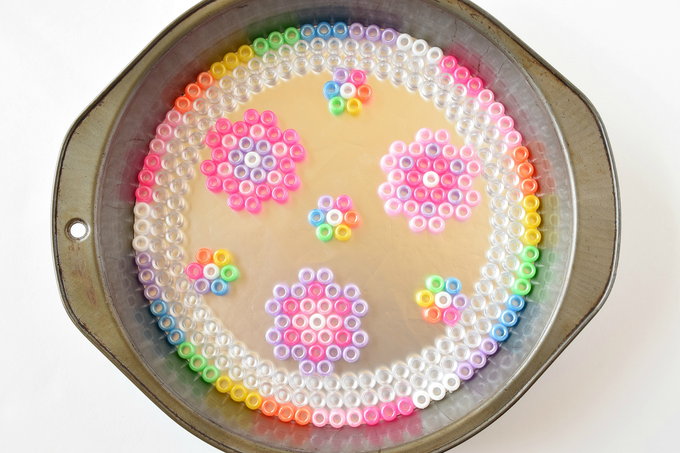 Put three (3) small rainbow flowers at equal distances around the outside. They should touch the clear bead edge.
Build one small rainbow flower in the center.
Build three (3) large flowers between the rainbow flowers. The large flowers should also touch the clear bead edge.
Once all the flowers are in, look to see that they’re at equal distances apart.
Closely outline all the flowers with clear beads.
Background
 Snugly fill in all of the open areas with clear beads. You don’t want any big gaps because the beads won’t connect so there will be a hole.
Preparing to Bake
Filling in the background can move the beads around. So before you bake it, go back over all of the beads and check for these critical things:
- If there are big gaps in the clear beads try to fit in a bead. If a bead won’t fit in the gap, try to lessen large gaps by moving the clear beads a little closer together.
- Make sure the outside row is lying flat and not tipped.
- Move the clear ones in closely around the flowers.
- IMPORTANT last step: Make sure all of the beads that make up the flowers are correctly positioned. The petals should touch each other and the center bead. If they’re off that’s how they’re going to melt.
Baking the Disk
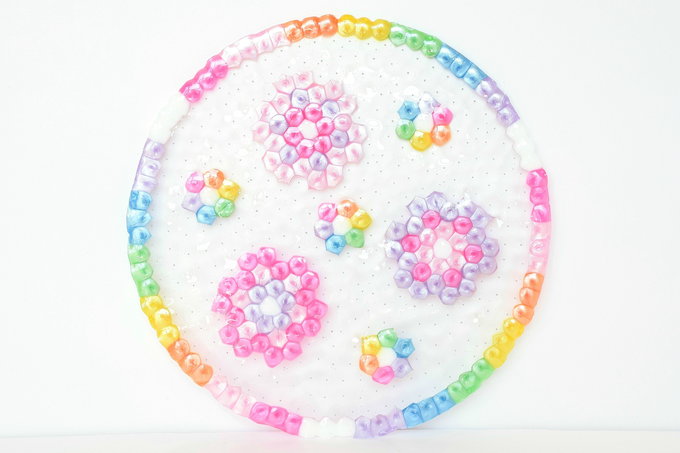 Preheat oven to 375º. Put the pan in the oven very carefully so the beads don’t shift out of place.
Bake for 35 minutes. If you see holes after the first 35 minutes, cook another 5 then check it. Then if needed, cook another 5 minutes. It will make an unusual noxious plastic smell when cooking.
When it is cooling you will hear some cracking sounds which are normal. Let it cool completely. Remove the disk from the pan. Peel the aluminum foil off the disk.
Sometimes a little bit of aluminum melts inside the beads. I shave those off with a metal nail file. I feel along the upper edge too. If it feels sharp, I file that a little bit too.
First Forming
IMPORTANT: Only adults should complete these remaining steps.
Preheat oven to 375º.
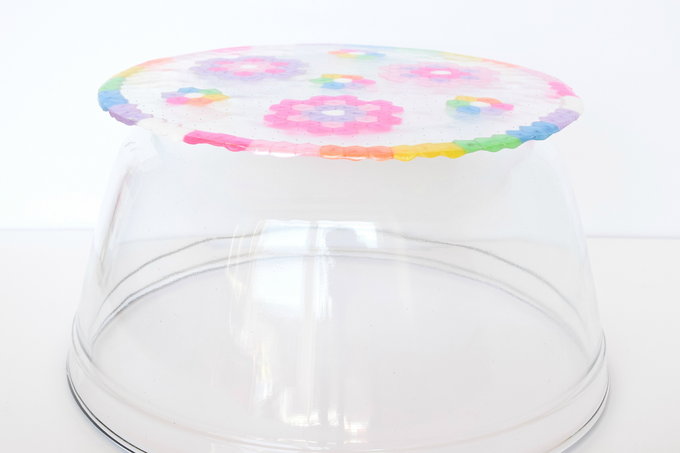 This step makes the disk look like a rimmed plate and shapes the bottom. Put the large glass bowl upside down in the center of a rimmed baking sheet. Center the disk with the bumpy side down and smooth up on the bottom of the bowl. Put the pan in the oven very carefully so it doesn’t get off center.
Bake for 6 minutes.
 (This is a simulated photo of how it would look on the baking sheet. ) During cooking, put on long oven mitts. Immediately after you take it out of the oven, quickly and continuously press down on all of the edges and sides (NOT the bottom) to form them to the bowl. Keep pressing and turning trying to work the sides smooth until it firms up. You must work as fast as you can because it hardens in seconds. Keep it centered.
CAUTION: the bowl, beads, and pan will be extremely hot.
Let it cool completely on the bowl.
Forming the Bowl
 This step makes the bowl a little bit deeper. Put the rimmed bead plate inside the large glass bowl with the rim up. Place the medium glass bowl on top of the rimmed plate and center it. Put the large bowl in the oven on the baking sheet very carefully so the medium bowl doesn’t get off center.
Bake for 15 minutes.
During cooking, the medium bowl should have sunken down into the rimmed plate. This presses it down into the large bowl further and gives it a little higher rim.
Toward the end of its cooking, put on long oven mitts. Immediately after you take it out of the oven, quickly press down on the medium bowl to make sure it sunk. Then lift the medium glass bowl out.
Then quickly and continuously press down on just the outer edge to form it to the bowl to smooth any wrinkles. Keep pressing and turning trying to work the sides smooth until it firms up. Let it cool completely in the bowl.
